My favorite way to run screen

First, make sure you have screen installed:

[bash]
$ sudo apt-get install screen
[/bash]

Then, create a .screenrc file with the following in it:
[bash]
screen -t root sudo su –
screen -t bash2
screen -t bash3

select 0
startup_message off

caption always "%{= kw}%-w%{= bw}%n %t%{-}%+w %-= @%H – %c – (%l)"
#
# Call via: screen -R -e^Hh -d
#
# to change the strings, look at:
# http://www.gnu.org/software/screen/manual/screen.html#String-Escapes
#
# to test your changes, you can either copy the above line, the do
# CTRL-H : and then paste in the line above
#
# or, CTRL-H :source ~/.screenrc
[/bash]

Lastly, start up screen:
[bash]
screen -R -e^Hh -d
[/bash]

This let’s you switch screens by pressing CTRL-H and then SPACEBAR. (I found that I use CTRL-A far too much to let that be the standard screen key binding)

Let WordPress remember your FTP credentials

I’ve found it quite useful to let WordPress remember my FTP information, so that adding new plugins/themes and doing security updates can happen quite quickly.

First, gather up your FTP username, password and host.
Next, open up the ./wp-config.php file. I like to put in the FTP information after the MySQL settings area:

[php]
/** Database Charset to use in creating database tables. */
define(‘DB_CHARSET’, ‘utf8’);

/** The Database Collate type. Don’t change this if in doubt. */
define(‘DB_COLLATE’, ”);

define(‘FTP_HOST’, ‘yourFTP_Hostname’);
define(‘FTP_USER’, ‘yourFTP_Username’);
define(‘FTP_PASS’, ‘yourFTP_Password’);
define(‘FTP_SSL’, false);
[/php]

To test it out, try to install a plugin.

In case of problems

2-3% of the time, WordPress has problems doing the FTP, even though I know that the information is correct. In that case, here is a workaround.

[sourcecode language=”plain”]
mysql>
mysql> select * from wp_options where option_name = ‘ftp_credentials’;
+———–+—————–+———————————————————————————————————-+———-+
| option_id | option_name | option_value | autoload |
+———–+—————–+———————————————————————————————————-+———-+
| 876 | ftp_credentials | a:3:{s:8:"hostname";s:12:"example.com";s:8:"username";s:8:"someUsername";s:15:"connection_type";s:3:"ftp";} | yes |
+———–+—————–+———————————————————————————————————-+———-+
1 row in set (0.00 sec)

[/sourcecode]

Take a look at what’s there, copy and paste it to a temporary safe place, then delete it from inside of MySQL:

[sourcecode language=”plain”]
mysql> delete from wp_options where option_name = ‘ftp_credentials’;
Query OK, 1 row affected (0.00 sec)

mysql>
[/sourcecode]

Switch back to your browser, and try installing the plug-in again. This time it should work.
Stash your mysql password in the .my.cnf file

Hopefully you are using usernames and passwords when accessing your MySQL databases. Security can make it hard to quickly jump in and start working in the MySQL shell if your password is quite complicated.

Here’s the solution:

create a ~/.my.cnf file and fill it with:

[client]
database=yourDBname
user=yourDBusername
password=yourSuperSecretPassword

Next, make sure that only you can read it:

chmod 600 ~/.my.cnf

Lastly, test it out:

user@host:~$ mysql
Reading table information for completion of table and column names
You can turn off this feature to get a quicker startup with -A

Welcome to the MySQL monitor. Commands end with ; or \g.
Your MySQL connection id is 65863
Server version: 5.5.31-0ubuntu0.12.04.2 (Ubuntu)

Copyright (c) 2000, 2013, Oracle and/or its affiliates. All rights reserved.

Oracle is a registered trademark of Oracle Corporation and/or its
affiliates. Other names may be trademarks of their respective
owners.

Type 'help;' or '\h' for help. Type '\c' to clear the current input statement.

mysql> show tables;
+-----------------------+
| Tables_in_yourDBname |
+-----------------------+
| wp_commentmeta |
| wp_comments |
| wp_links |
| wp_options |
| wp_postmeta |
| wp_posts |
| wp_term_relationships |
| wp_term_taxonomy |
| wp_terms |
| wp_usermeta |
| wp_users |
+-----------------------+
11 rows in set (0.00 sec)

mysql>


Voila! In there without having to worry about needing to look up your password.

Git – automagically add modified files and rm deleted files

Sometimes a script will upgrade/add/modify/delete a large swath of files (possibly due to an upgrade-type script). If you are lazy, then you’ll want a script to help you commit those files. Here’s what I’ve come up with:

To perform a git add to all modified files:
[bash]
for file in `git status | grep modified | cut -d ":" -f 2`; do git add $file; done
[/bash]

To perform a git rm to all modified files:
[bash]
for file in `git status | grep deleted | cut -d ":" -f 2`; do git rm $file; done
[/bash]

Testing a website at its new IP address

How do you check that your new website is working without updating the DNS for the domain?

Well, if you know the new IP address, you can “trick” your home computer/browser to show the site you want, rather than the old site.

1) For Windows 7, click on the Start Menu, choose “All Programs” >> Accessories.
Next right-click on Notepad, and choose “Run as administrator”

2) Choose File, then Open…
In the File name: type in c:\windows\system32\drivers\etc\*.*
Find the “hosts” file, click on it, then click on the “Open” button.

3) Scroll down to the very bottom of the file, and add in a new line in this format, IP Address (whitespace) domain name:


111.222.33.44     www.example.com
44.55.66.77       new.example.com

Once you save the file, you’ll instantly be able to type in the domain name that you want to test. With the above example, that means typing in http://new.example.com will take you to the server at the IP address of 44.55.66.77. And if instead you typed in http://www.example.com, you would hit the server located at 111.222.33.44.

Have your bash prompt tell you git information

While you can obviously type in “git status” to see what’s happening (git-wise) in a directory, wouldn’t it be nice if you could automagically see that info?

Well, you can. Just add this snippet to your ~/.bash_profile file:

[code lang=”bash”]
if [ -f /etc/bash_completion.d/git ]; then
. /etc/bash_completion.d/git
PS1=’\[\u@\h \e[33m\]\w\[\e[0m\] $(__git_ps1 " (%s)")\n\$ ‘
fi
[/code]

Or, if that file doesn’t exist, you can create it with all of this code:

[bash]
# .bash_profile

# Get the aliases and functions
if [ -f ~/.bashrc ]; then
. ~/.bashrc
fi

# User specific environment and startup programs

PATH=$PATH:$HOME/bin

export PATH
if [ -f /etc/bash_completion.d/git ]; then
. /etc/bash_completion.d/git
PS1=’\[\u@\h \e[33m\]\w\[\e[0m\] $(__git_ps1 " (%s)")\n\$ ‘
fi

####
# Stash away examples of other possibilities for the prompt
#####
# PS1='[\u@\h \W$(__git_ps1 " (%s)")]\$ ‘
# PS1=’\[\e]0;\w\a\]\n\[\e[32m\]\u@\h \[\e[33m\]\w\[\e[0m\]\n\$’
# PS1='[\u@\h \W$(__git_ps1 " (%s)")] \[\e[33m\]\w\[\e[0m\]\n\$’
[/bash]


Update!

I tried this on an older server that didn’t have /etc/bash_completion.d on it, and here’s how I got it to work.

1) Downloaded the latest stable version of https://github.com/telemachus/bash_completion.d and copied that directory into /etc/bash_completion.d

2) Created a symbolic link:
[bash]
ln -s /etc/bash_completion.d/git-completion.bash /etc/bash_completion.d/git
[/bash]

3) If you get this error:
[bash]
-bash: __git_ps1: command not found
[/bash] then you will need to add this

[bash]
if [ -f /etc/bash_completion.d/git-prompt.bash ]; then
. /etc/bash_completion.d/git-prompt.bash
fi
[/bash]

before the call to . /etc/bash_completion.d/git

Easy to use ‘touch’ command for windows/gui

I’m really used to being able to change timestamps from inside the unix shell. Occasionally I need to do this in Windows, and it’s not that simple to do. However, this tool brings right-clicking on a filename to change timestamps to your computer:

TouchPro by JD Design

TouchPro allows you to change any combination of file time attributes through a file’s property pages. It fully integrates into Windows Explorer giving you the ability to affect the timestamps of:

  • Individual files
  • The results of any file searches possible with Explorer. For example: particular file types, or for files within a date range.
  • Entire folder hierarchies

The registered version of TouchPro enables extra facilities:

  • Separate time & date modification.
  • Touch files and/or folders.
  • Touch read-only files and folders.
  • Save settings.
  • Time offset modification – useful if your computer or camera’s date is set incorrectly and you need files timestamps changing to the correct time.
  • Load the time from the timestamp of a file or folder, or from embedded time properties in pictures, email or Microsoft Office documents.
  • Select 24 hour time, and long or short date format.
  • Command line version.
  • Context menu operations to Touch with the saved settings, or the current time.

Force all web traffic to redirect to SSL (https) web server using .htaccess file

Here is the minimum amount of configuration needed to force all web traffic (port 80, http) over to https (port 443 via SSL).

1) Create a .htaccess file that looks similar to this one:

RewriteEngine On
RewriteCond %{SERVER_PORT} 80
RewriteRule ^(.*) https://www.example.com/$1 [L]

and place it at the root of the web server directory where you want to redirect the traffic. Restart apache.

2) If that doesn’t work, you might need to modify your apache config file’s AllowOverride setting. If you were trying to use a .htaccess file just inside of the /var/www directory, you might need to edit /etc/apache2/sites-enabled/[name-of-your-site]

...
   <Directory /var/www/>
        ...
        Options FollowSymLinks
        AllowOverride FileInfo
        ...
   </Directory>

NOTE: Your web site might have other directives for Options and AllowOverride, but the 2 that I have show are the bare minimum to get the .htaccess file working.

Make vim “more readable” on black backgrounds

I pretty much live inside of putty/ssh. My defaults are a black background with white/light lettering. However, when I first get to a new system, I find that this is one of the first things that I need to change. Makes reading comments in code sooo much easier.

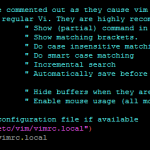
vim-before-background-dark

So, go ahead and modify /etc/vim/vimrc
[bash]
" If using a dark background within the editing area and syntax highlighting
" turn on this option as well
"set background=dark
[/bash]

and remove the ” (double quote) from in front of set background=dark. This uncomments it, and makes that set vcommand visible to vi.

[bash]
" If using a dark background within the editing area and syntax highlighting
" turn on this option as well
set background=dark
[/bash]

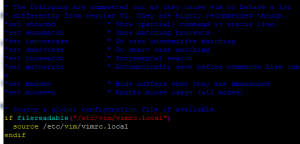
vim-after-background-dark